
Understanding Custom Brushes in Photoshop
Custom brushes expand the creative toolbox beyond the default set supplied by Adobe. By converting an image selection into a brush tip, artists can introduce unique textures, patterns, and effects into digital illustrations, photo retouching, and layout design. The process works with any image that contains interesting detail, allowing for a highly personalized brush library.
Preparing Your Canvas and Source Image
The first step is to open the source image in Photoshop. According to Adobe Inc., you should select an image with clear details that you wish to translate into a brush. Once the image is open, create a new document that will serve as the brush canvas. The recommended setup is a square document with a white or transparent background, as outlined in the step-by-step design guide. Using a transparent background ensures that the brush tip captures only the intended shape without unwanted background artifacts.
When setting up the new document, configure the resolution to match your intended output—typically 300 ppi for print or 72 ppi for screen work. Maintaining consistent resolution between the source image and the brush canvas avoids scaling issues later in the workflow.
Creating a Brush Tip from an Image Selection
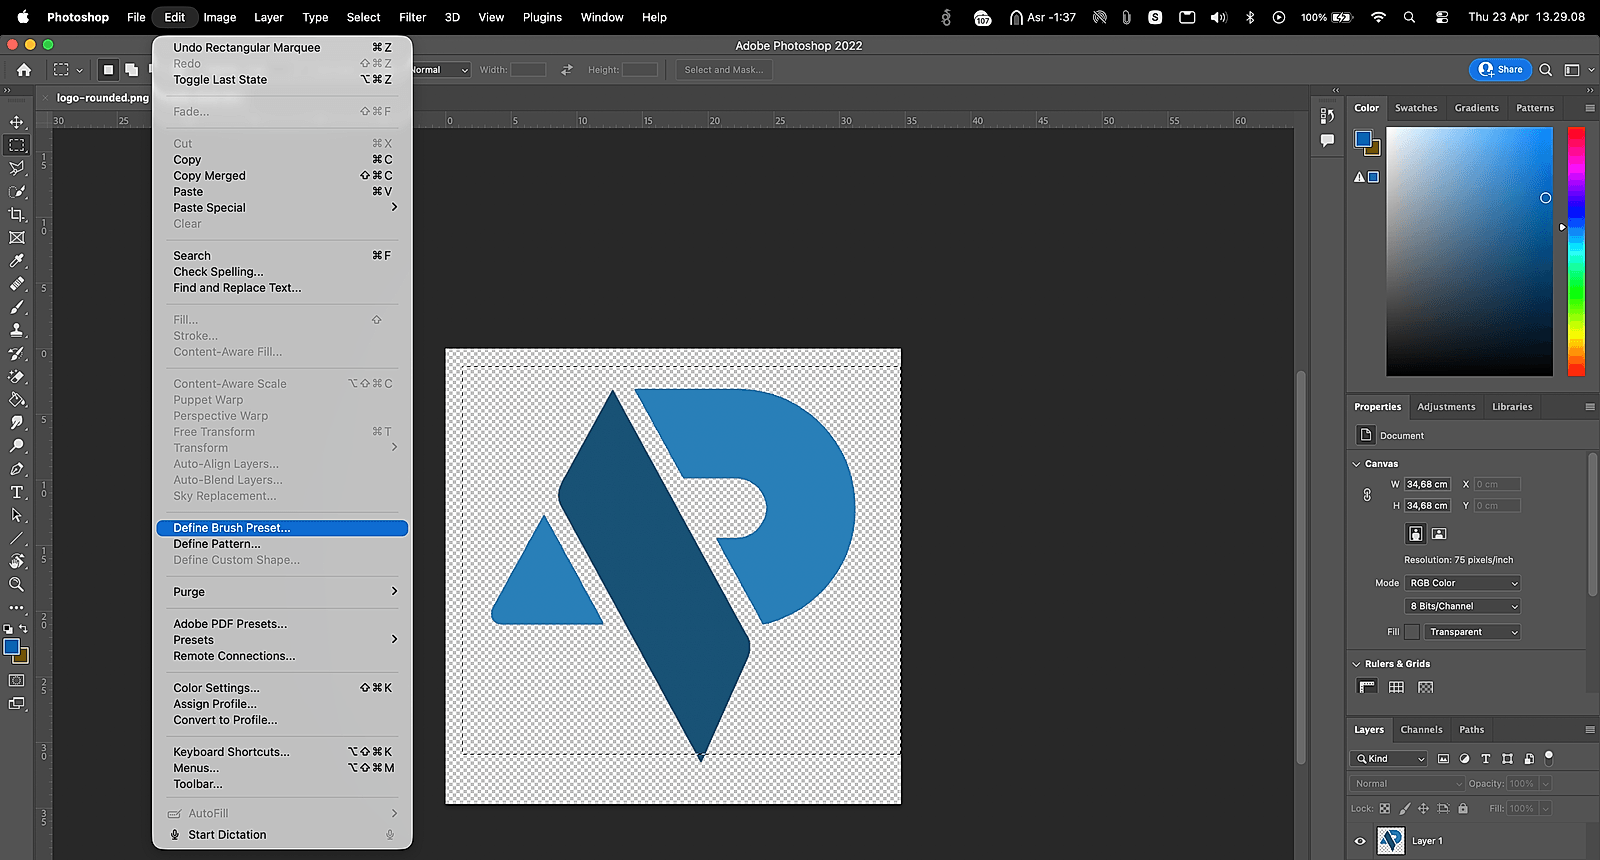
With the source image open, use any selection tool (Marquee, Lasso, or Quick Selection) to isolate the portion you want to become a brush tip. Adobe Inc. notes that converting this selection directly into a brush tip preserves the texture and detail of the original image. After the selection is active, go to the Edit menu and choose “Define Brush Preset.” A dialog box prompts you to name the new brush; choose a descriptive name that reflects its texture or purpose.
The newly defined brush now appears in the Brushes panel. If the brush tip appears too large or too small, you can resize it using the Brush Size slider (shortcut: bracket keys) when painting. The size adjustment does not alter the underlying brush tip definition; it merely scales the rendering at brushstroke time.
Adjusting Brush Settings for Desired Behavior
After defining the brush, open the Brush Settings panel to fine‑tune its behavior. The panel offers controls for Shape Dynamics, Scattering, Texture, Dual Brush, and more. For texture‑rich brushes, enable the Texture option and load the same source image or a complementary pattern to influence the stroke’s visual complexity.
Shape Dynamics lets you vary brush size, angle, and roundness based on pen pressure or stylus tilt, enhancing realism for digital painting. Scattering distributes brush copies across a stroke, useful for creating foliage or grain effects. The Dual Brush feature lets you combine two brush tips—your custom tip and a standard shape—to generate intricate composite strokes.
Once satisfied with the settings, click the “New Brush Preset” button at the bottom of the panel. This action saves the current configuration as a separate preset, preserving the original brush tip while allowing multiple variations (e.g., different hardness or spacing).
Saving and Adding Custom Brushes in Photoshop 2026
Photoshop 2026 streamlines brush management through a dedicated “Add Brushes” workflow. The 2026 guide explains that you can import brushes by dragging .abr files into the Brushes panel or by using the “Import Brushes” command from the panel’s menu. To share your custom brush with other projects, export it as an .abr file: select the brush(s) in the panel, click the panel menu, and choose “Export Selected Brushes.” Save the file to a known location.
To load the exported brush set, open Photoshop 2026, access the Brushes panel, and select “Import Brushes.” Navigate to the saved .abr file and confirm. The imported brushes appear alongside the default set, ready for immediate use.
Organizing and Managing Custom Brush Libraries
Effective organization prevents clutter and speeds up workflow. Mastering Brush Customization tutorials recommend creating custom groups within the Brushes panel. Right‑click in the panel and select “New Group,” then drag related brushes into the group. Naming conventions—such as “Texture‑Grain,” “Hand‑Drawn‑Lines,” or “Pattern‑Fill”—help locate brushes quickly.
For designers who rely on actions, integrating custom brushes into Photoshop actions ensures consistent usage across multiple files. The “Creating Custom Brushes for Efficient” resource emphasizes that you can record an action that selects a specific brush preset, sets desired opacity, and applies a stroke, thereby automating repetitive tasks.
Practical Applications of Custom Brushes
Custom brushes serve multiple creative purposes. In digital illustration, they can mimic natural media like charcoal, watercolor, or ink washes. In photo retouching, texture brushes help apply dust, light leaks, or vignette effects without affecting the underlying image layers. For pattern design, repeating brush strokes can generate seamless textures that scale without loss of detail.
Because the brush tip originates from an image, any photographic element—such as a leaf, fabric weave, or architectural detail—can become a reusable asset. This versatility aligns with the advice from creativepro.com, which states that virtually any photo, shape, or hand‑drawn image can be transformed into a custom Photoshop brush.
Summary
Creating custom brushes in Photoshop involves selecting an image, defining a brush tip, adjusting detailed brush settings, and saving the preset for future use. Photoshop 2026 simplifies importing and exporting brush libraries, while organized groups and action integration enhance workflow efficiency. By following the steps outlined above, designers can expand their creative palette with unique textures and effects derived directly from their own visual assets.